The 10 Step Guide to Becoming A Twitter Expert in Under 10 Minutes
More than 320 million users use Twitter every month to voice their opinions, promote their products, support customers, take polls and run campaigns; all within the boundaries of 140 characters. Even for marketers with years of experience crafting effective copy, keeping a Twitter page running smoothly is a tough task. With the average lifetime of a tweet running to only 18 minutes, it’s a tough task keeping your name or brand in the spotlight. Lucky for us, there is a treasure trove of amazing tools dedicated to making our Twitter experience truly exceptional. From handling multiple twitter accounts to finding the right content to post to even telling you the right time to engage with your audience, these tools have made the Twitter journey much easier.
Here’s a 10 step guide that’ll take you through how to manage your Twitter account and the tools that help you do it.
Step 1: Managing your Twitter Accounts
Tools: TweetDeck
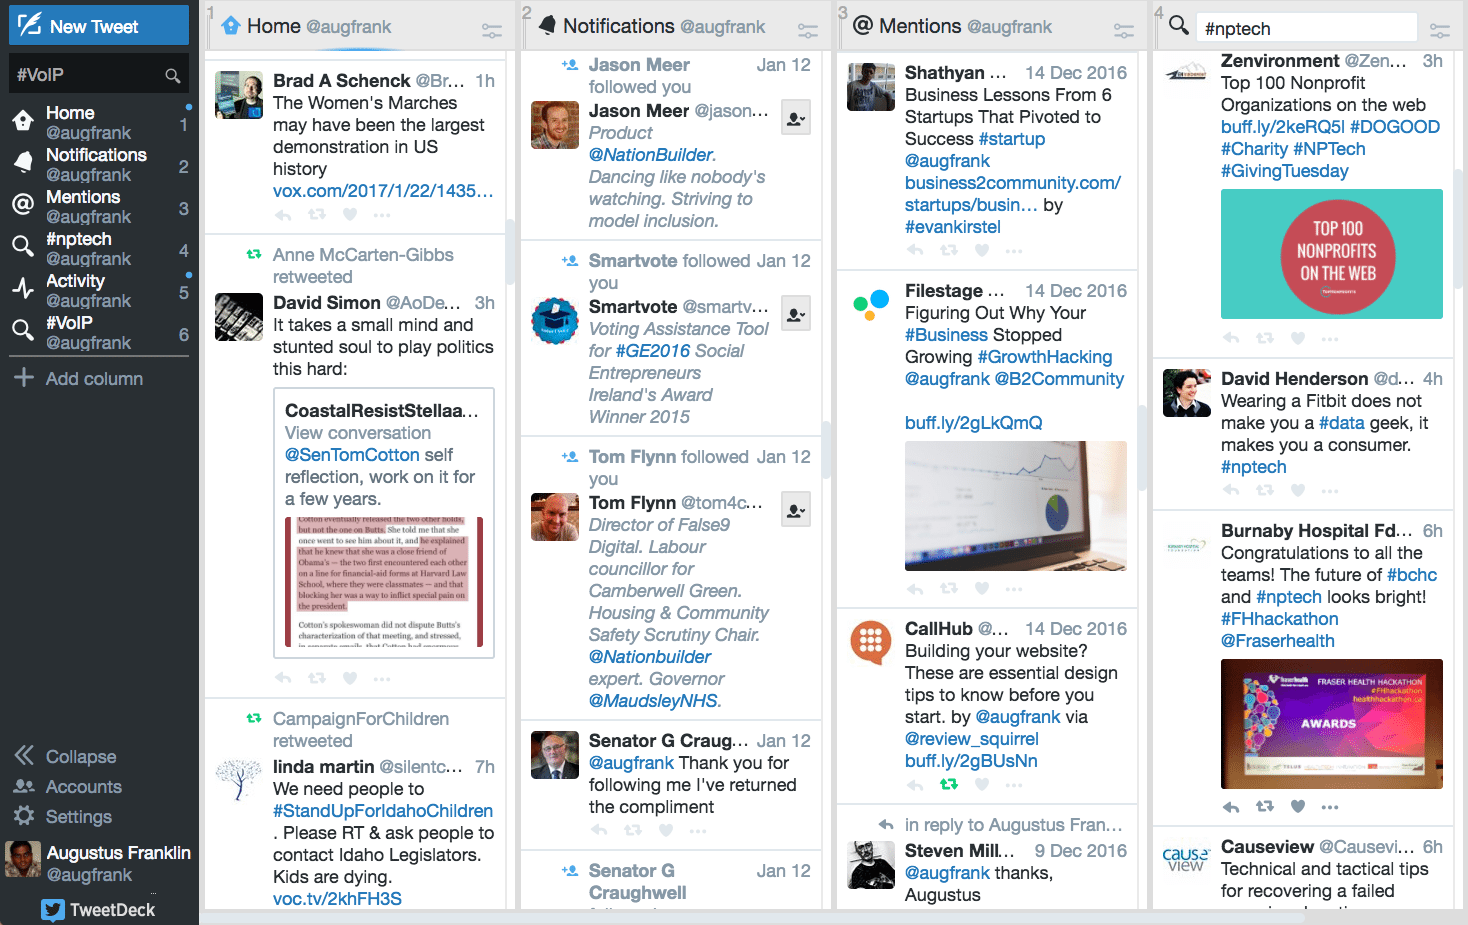
The first step to growing your Twitter audience is knowing how to keep track of all the metrics that come with it.
I don’t mean going to the analytics page and looking at the beautiful graphs. We’ll get to that after you’ve grown your follower count to a halfway decent number.
I meant that you have to keep track of your followers, the people you follow, relevant hashtags, mentions, and messages. TweetDeck does an excellent job of serving up the information in a neat dashboard with multiple timelines, so you can view all the information at once. Managing multiple accounts is also a breeze with the app.
Unfortunately, there’s no mobile app, so you’re going to have to stick with the web version for now.
Go to TweetDeck, add your Twitter accounts and you’re all set to create multiple timelines across the dashboard. The UI is pretty straightforward but if you’re having any trouble check out this video for a quick guide on how to set it up.
Step 2: Finding The Right Content
Tools: Flipboard, DrumUp, Feedly
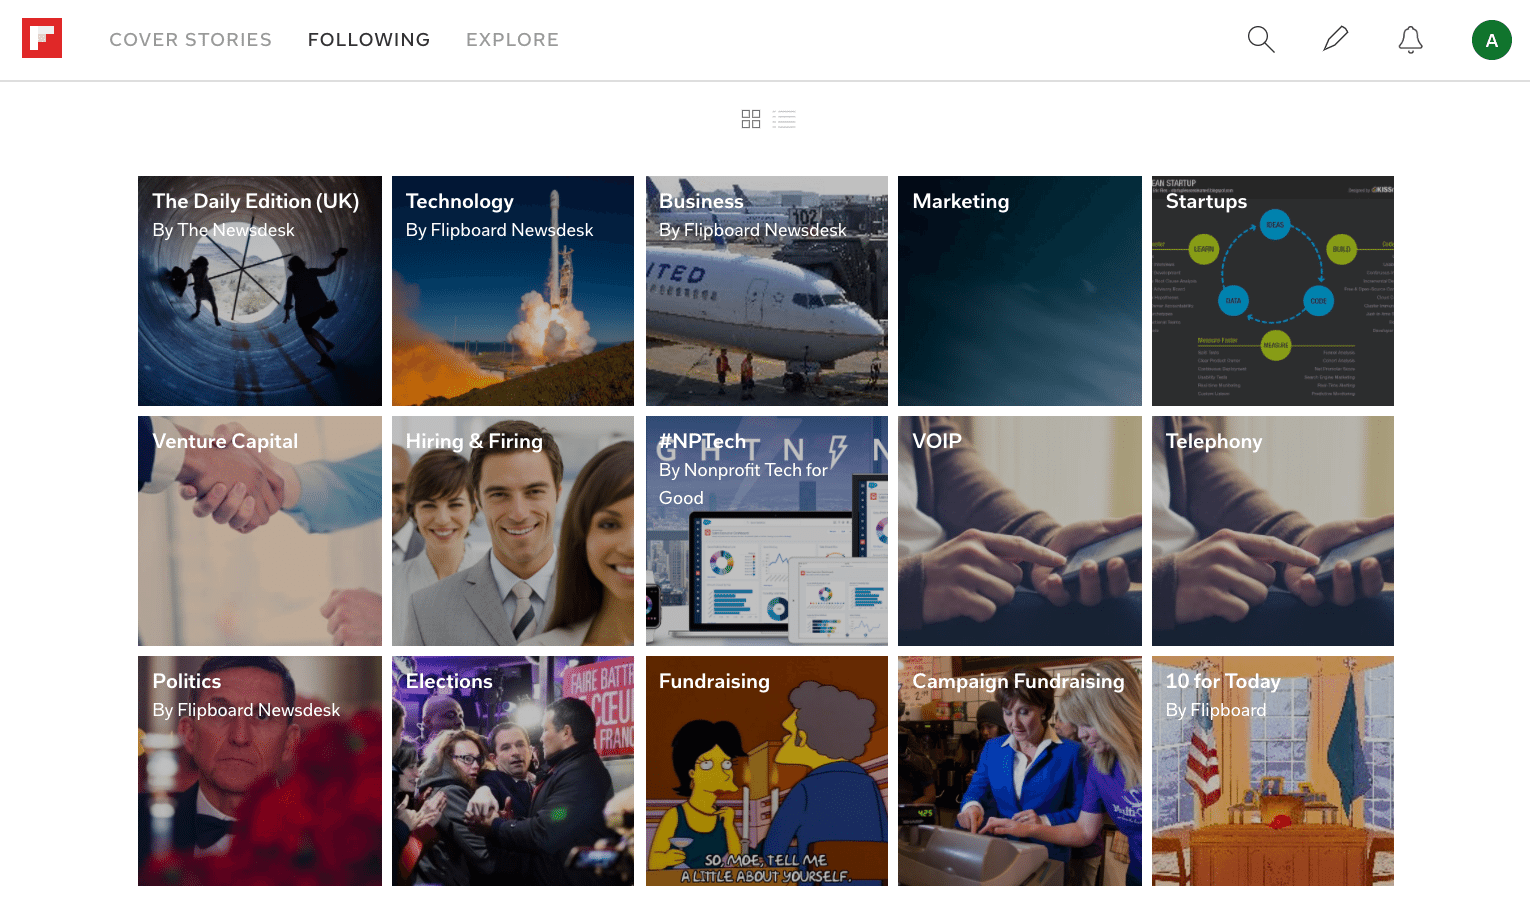
According to Moz, the lifetime of your tweet is a mere 18 minutes. That means you need to be tweeting every 18 minutes to keep your tweets in the spotlight. That’s 80 tweets a day, which might be overdoing it. Let’s stick to a decent number of 10-15 tweets a day. And unless you’re a prolific writer who can bring out new quality content by the hour, you need to have a strategy in place for shareable content.
Luckily there is a host of excellent content curation services where you can type in relevant keywords and find quality content.
So step 2 of expanding your Twitter presence is finding and sharing the right content.
I have 3 go-to resources for finding good content:
- DrumUp
- Feedly
With Flipboard and Feedly, you get a neat content curator with enough flexibility to cover almost every keyword you throw at it.
But then, you have to manually share the link to Twitter or copy and paste the link to a post scheduler like Buffer. Feedly comes with a Buffer integration but you have to be on a paid plan to access the feature.
What works best for me is to save the content I find interesting to a read-it-later app like Pocket.
I spend around half an hour every day crawling through content, speed reading through the interesting stuff and saving all of it to Pocket.
Then I go to my Pocket desktop app and schedule the posts to Buffer.
With DrumUp, you get a content curator as well as a scheduler. The app populates your feed with articles matching your relevant keywords and lets you schedule them to Twitter with a single click.
It does a good job of it, but I feel Flipboard and Feedly do a slightly better job of curating content. The hassle of saving to Pocket and then scheduling to Buffer is one I don’t really mind.
Step 3: Scheduling Your Posts
Tools: Buffer

It’s just not practical for me to go into Twitter every hour to send out a new Tweet. That’s where Buffer works its magic. The scheduling tool lets you preset posting times allowing you to spread your posts across the day.
The free plan enables you to schedule ten posts a day, which is a decent number to keep your followers engaged and get potential followers interested.
You can only attach one social account to a free buffer account. But if you have an alternate email id you can go ahead and create an alternative account.
That means you’ll be managing two Twitter accounts with two separate Buffer accounts. If that’s too much trouble, the paid plan starts at just $10 per month.
Step 4: Automating Your Posts
Tools: Quuu
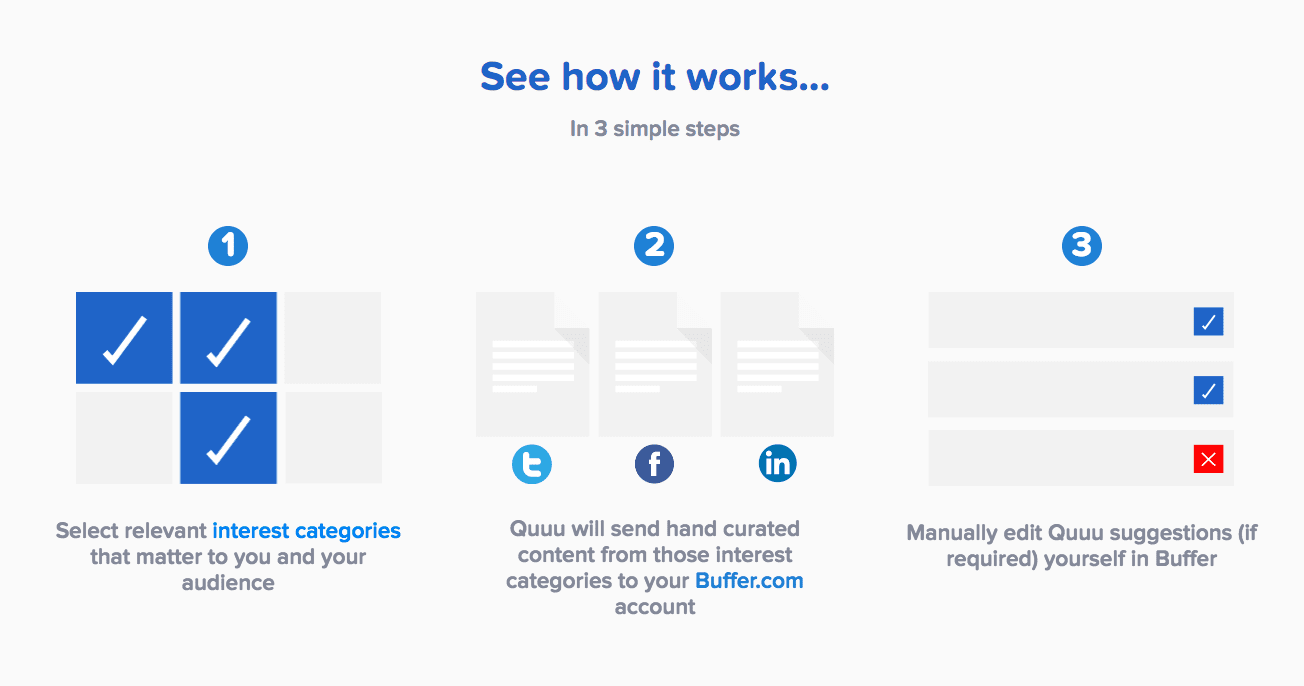
I’m going to add this neat tool to the list for all of you who are too busy to browse around for content. Quuu takes content curation one step further by curating great content as well as automatically sending it to your Buffer account.
Log In to the app by giving it access to your Buffer account. The free plan lets you select five categories and schedule two posts per day.
With Quuu, you might be inclined to think of the app as a one-stop solution for your content outreach.
But that’s far from being true. Quuu is a great tool for keeping your Twitter page in the spotlight and filling in the blanks when you’re out of shareable content.
It’s easy to sign-up for Quuu and then forget that Twitter is about real relationships. Unless you spend time on the platform — asking questions, giving answers and sharing personal stories and content that you loved reading — you’ll never be able to realize the full potential of what Twitter has to offer.
Ask yourself which person you’d rather follow —
a.John Doe, who shares personal anecdotes along with shared content.
b.Mark Keating, who has a bland title on top of shared content.
I’d choose ‘a.’
Step 5: Using Hashtags
Tools: Hashtagify
We’ve already decided that you’re going to posting around 10 tweets a day. The next step is to give your tweets as wide a reach as you can without behaving like spam.
Hashtags serve as a bridge between your Tweet and possibly thousands or millions of Twitter users.
So, the fifth step of amplifying your Twitter presence is using the right hashtags.
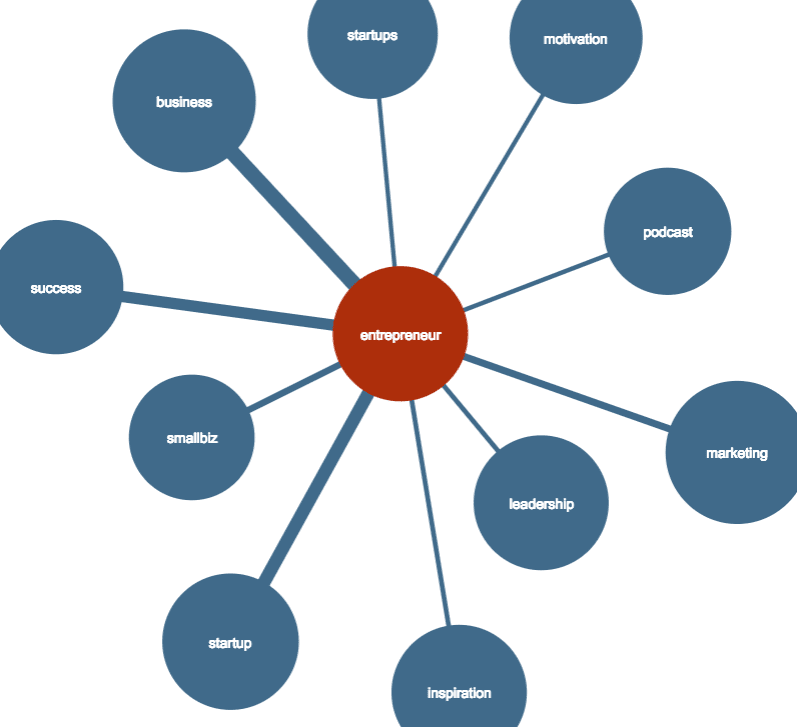
Hashtagify is my go-to resource to research hashtags before I add them to my content. When you’re posting to Twitter, type in a related hashtag into Hashtagify and you’ll get a cloud of related keywords and a popularity metric. The hashtags are scored from 1 to 100. The higher the score, the wider the reach.
On that note, it’s not all about how popular a keyword is. Maybe you’re targeting a niche audience and a niche keyword would work better for you. But when your only goal is to target a wide audience, sticking to the popular keywords always works.
Step 6: Deciding on Posting Time
Tools: Followerwonk
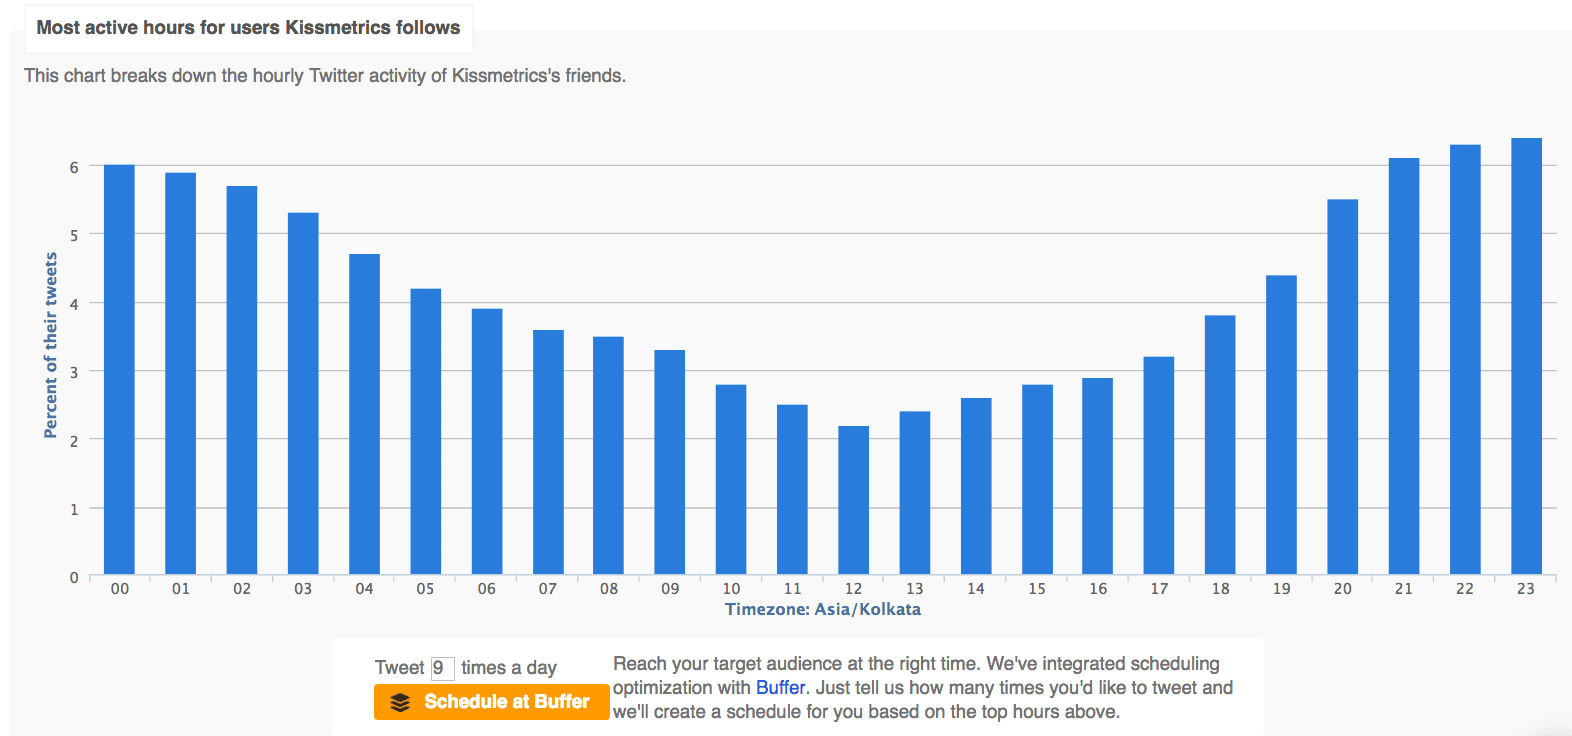
After you’ve found the right content and decided on which hashtags to use, the next step is determining the right time to send out your Tweets.
Lucky for us, Moz came out with the Followermonk app which analyses your followers and breaks down their Twitter activity.
A bar graph shows you when your followers are most active and when they’re not.
Create a custom schedule for your Tweets using the information or use the Buffer integration to send a personalized program into your Buffer account automatically.
Step 7: Creating Twitter Lists for Engagement
Tools: IFTTT
Your Twitter feed can get overwhelming with too many conversations about too many topics going on at the same time. The best way to segment conversations and people based on issues is to add them to separate Twitter lists.
For example — Let’s imagine that you sell phone cases. A cool new phone was just released and you only want to see conversations about the release. Right now, you don’t want the latest movie trend or political rant to appear on your feed.
If you’d already created a Twitter list you’re in luck. Just go to your “lists” and click on the list that probably says “The Techies” and jump in on the conversation.
If not, you’d better get started segmenting your followers and influencers into lists right now.
For more insights into Twitter lists and how to get started check out this link.
If you have a particular keyword that pertains to your business, there’s a neat tool called IFTTT you can use to automatically add people who use the hashtag into a Twitter list.
Step 8: Managing Your Followers
Tools: Crowdfire
If you’ve followed through till step 7 — it’s now time to take your Twitter account for some fine tuning and management.
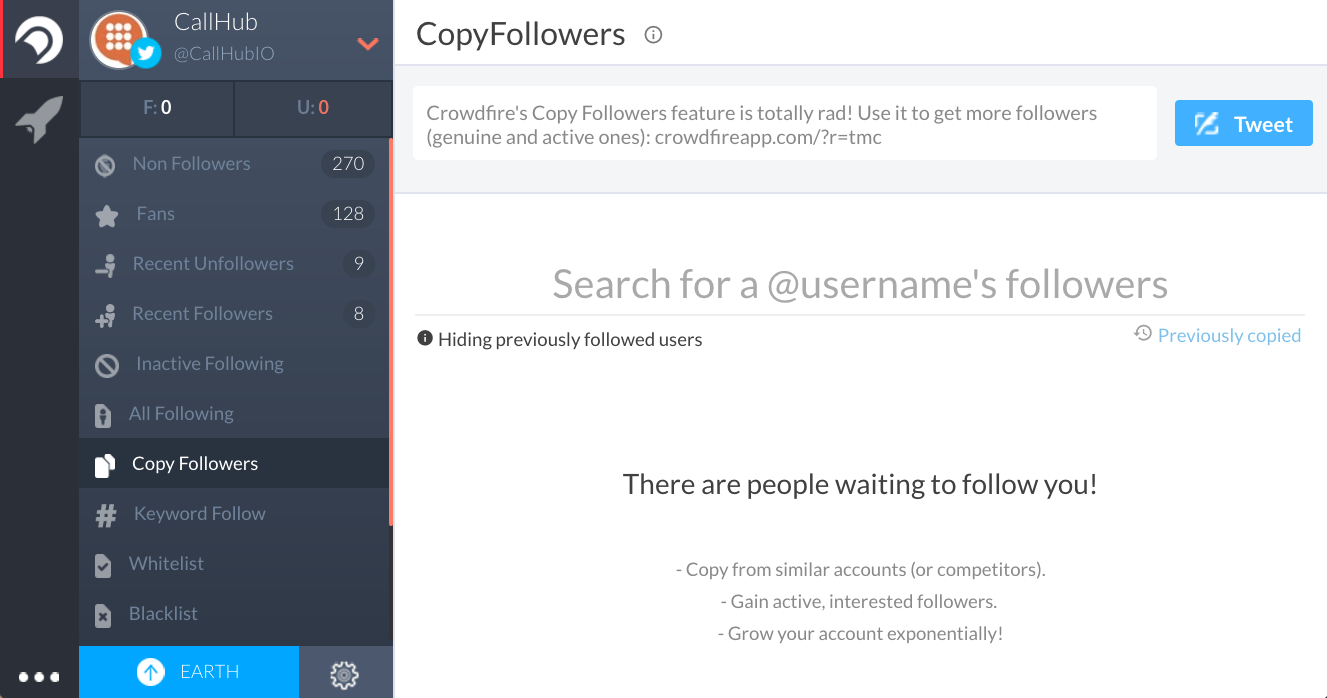
The Crowdfire App does a good job managing your followers and helping you find targeted people to follow.
During the preliminary stages of your Twitter account, you’re actively trying to gather new followers and make a name for yourself in the Twitter community.
The app makes it easy to unfollow inactive accounts and follow new people in your niche.
Either use the ‘keyword follow’ option to find influencers or the ‘copy followers’ option to import followers from influencers in your niche and start following them.
Be careful not to go crazy and follow every person on the list. Target the people you want to follow and set a final number to stop at.
A good rule of thumb is to support 100 targeted people every day and then come back the following day to unfollow those that don’t follow back.
There will be a few people who do not follow back, yet provide you real value through their Twitter feeds. Leave them in your follower list. Next time one of their Tweets catch your eye, be sure to comment and make yourself heard.
Step 9: Automating Your Engagement
Tools: Narrow
Some people just can’t find the time for Twitter. You might be on a jam-packed schedule, or maybe you just can’t bother with it.
Whatever your reasons, Narrow might be just the tool for you.
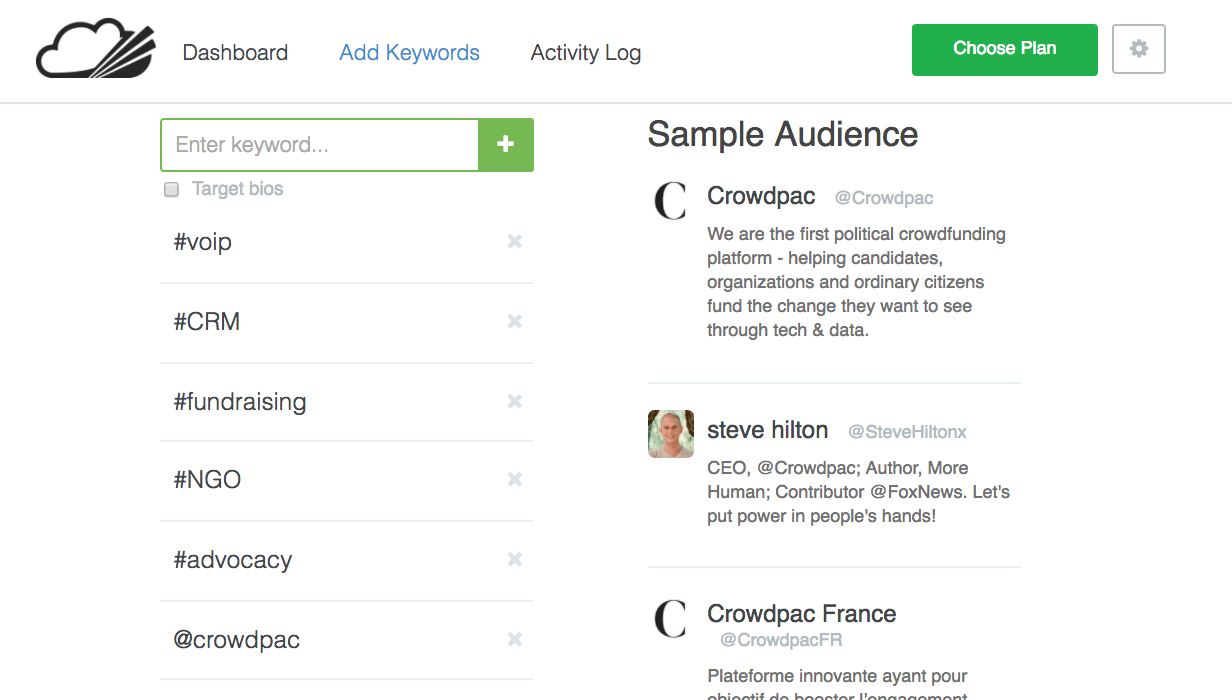
Based on a set of targeted keywords and websites that you select after signing up for the service, Narrow goes ahead and takes charge of your follower management.
It favorites tweets and follows accounts based on your target criteria. After 24 hours Narrow unfavorites and unfollows those accounts that have not followed you back.
What you’d been doing with Crowdfire, taken to the next level.
Step 10: Final Thoughts
Twitter is a fickle friend. There is no surefire way to win its allegiance. But now that you’ve been equipped with all the tools necessary to succeed, the tides are in your favor.
With so many resources at your behest, it’s easy to leave Twitter solely at the discretion of “smart” tools. But the tools are here only to make your journey easier, not to take the journey for you.
A Twitter feed thrives only through the personality of its creator. The only way to make your account personal and a platform to share and discuss new ideas is to take time away from the tools and to spend time on the platform.
So, step 10 is — alway be human.


